Setting up a Bluesky custom domain handle on Netlify

So you just started your Bluesky journey, huh?
And maybe you want to setup your own ✨fancy✨ custom domain handle (for example, mine is @cecy.ai).
Well, if you have a Netlify site, and you also bought your domain on Netlify, here's how you can set up your custom domain name on Bluesky:
This should apply to anyone who wants to setup a custom domain as a handle on Bluesky, BUT Steps 5 - 9 apply only if you have a domain you bought through Netlify.
- Open the Bluesky app, and go to Settings (by opening the menu on the left-hand side)
- Scroll down and click on "Change Handle"
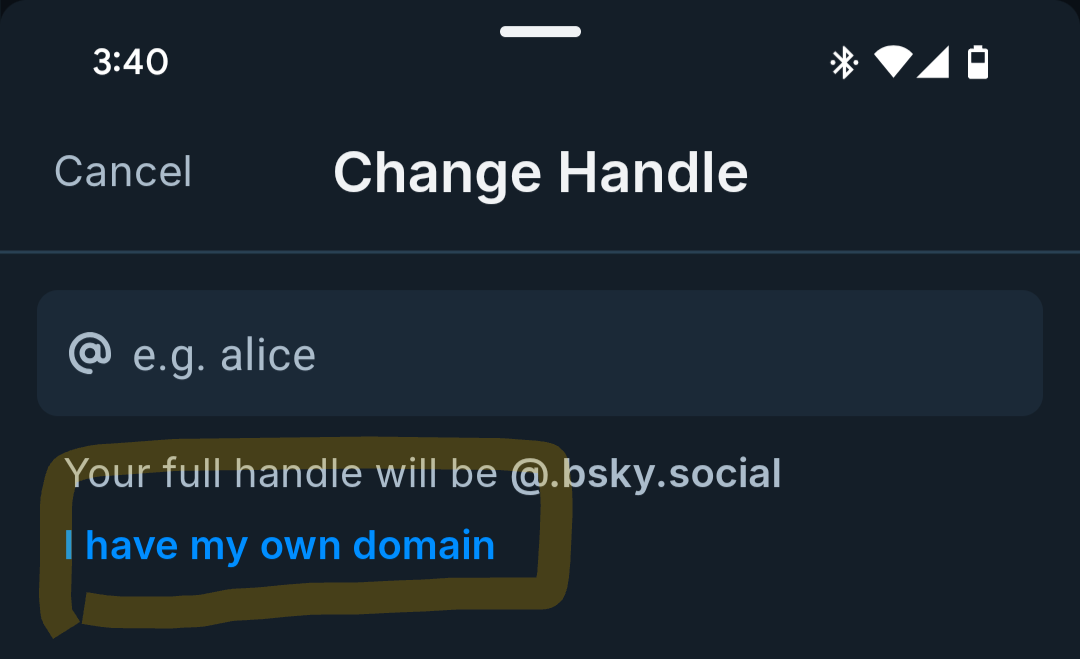
- Now click on "I have my own domain"

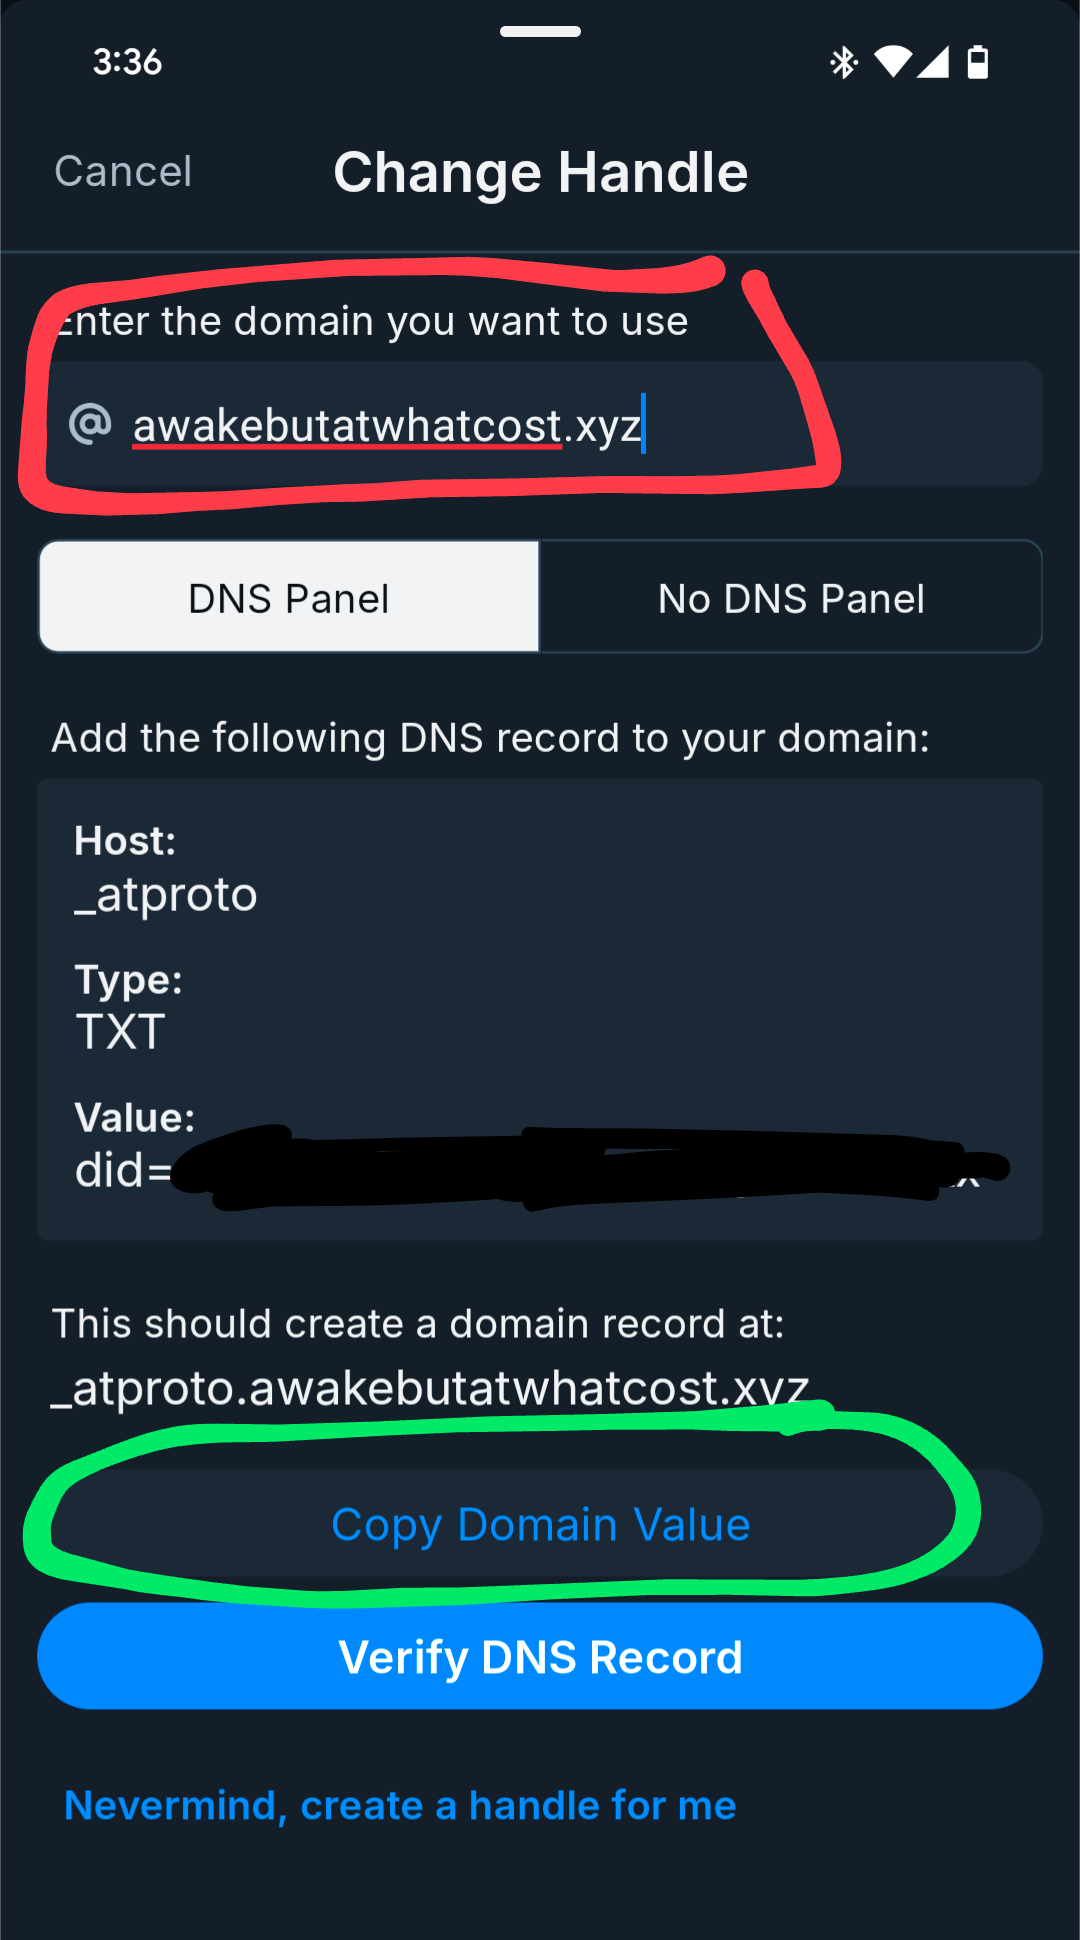
- Enter the domain you want to use at the top, then click on "Copy Domain Value"

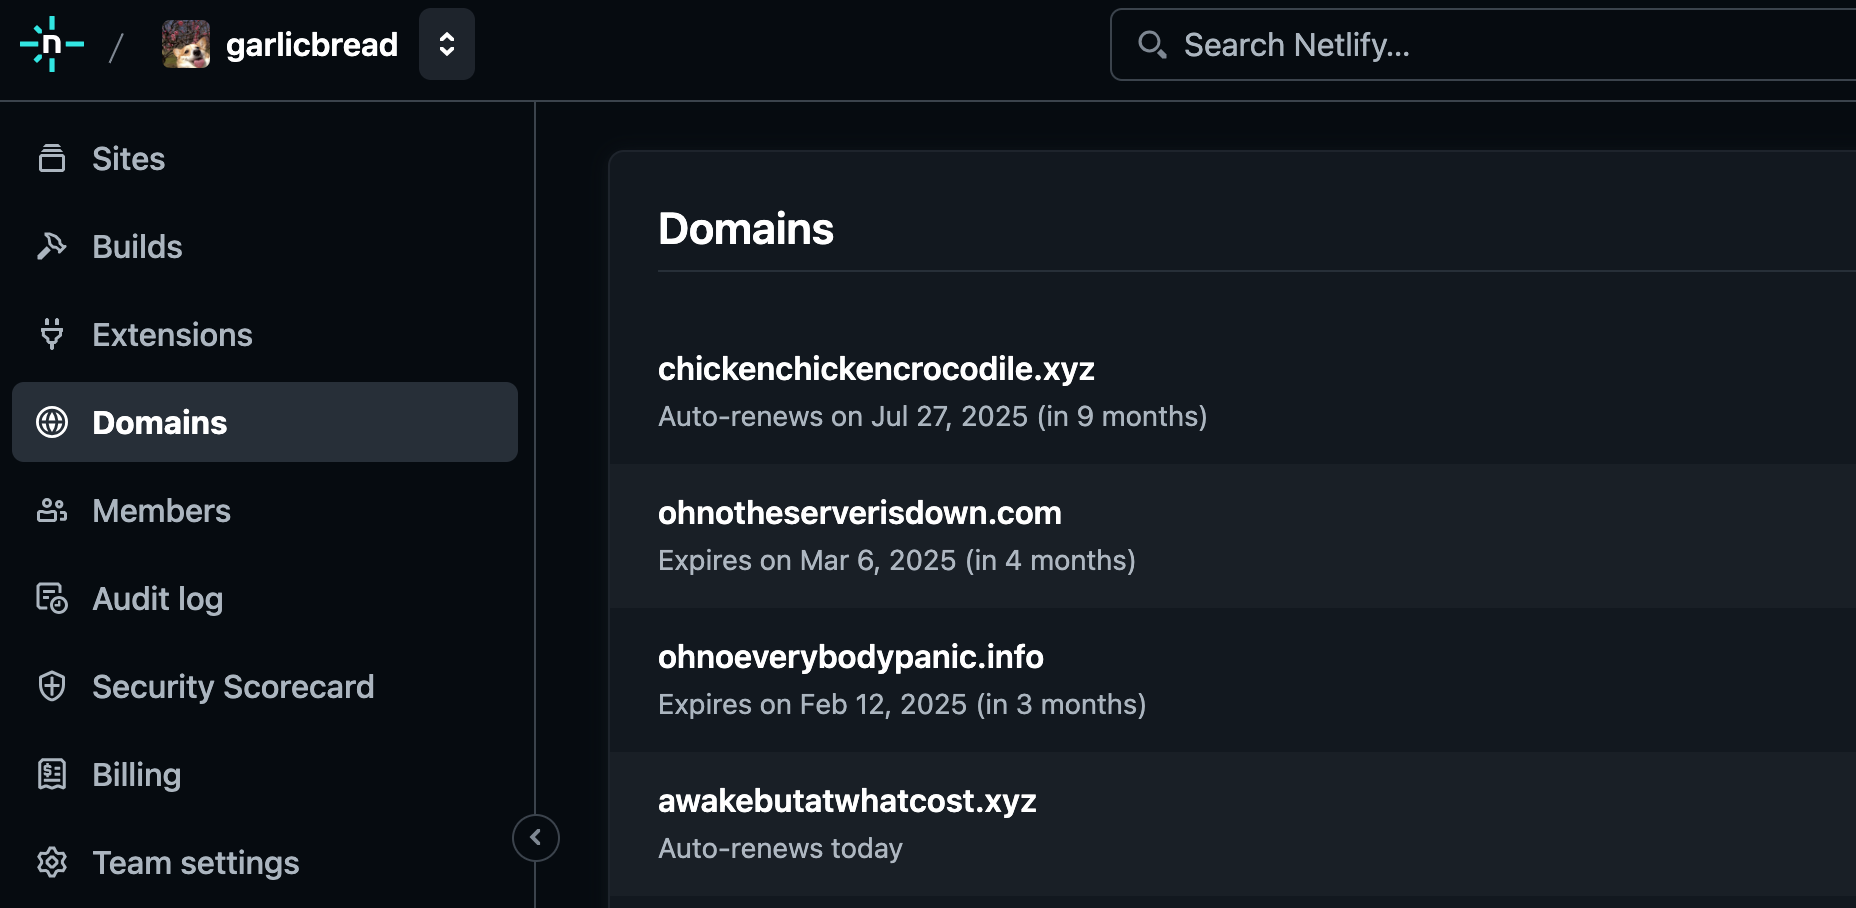
- Now go to your Netlify dashboard, and click on Domains

- Click on the domain you want to use as your Bluesky handle
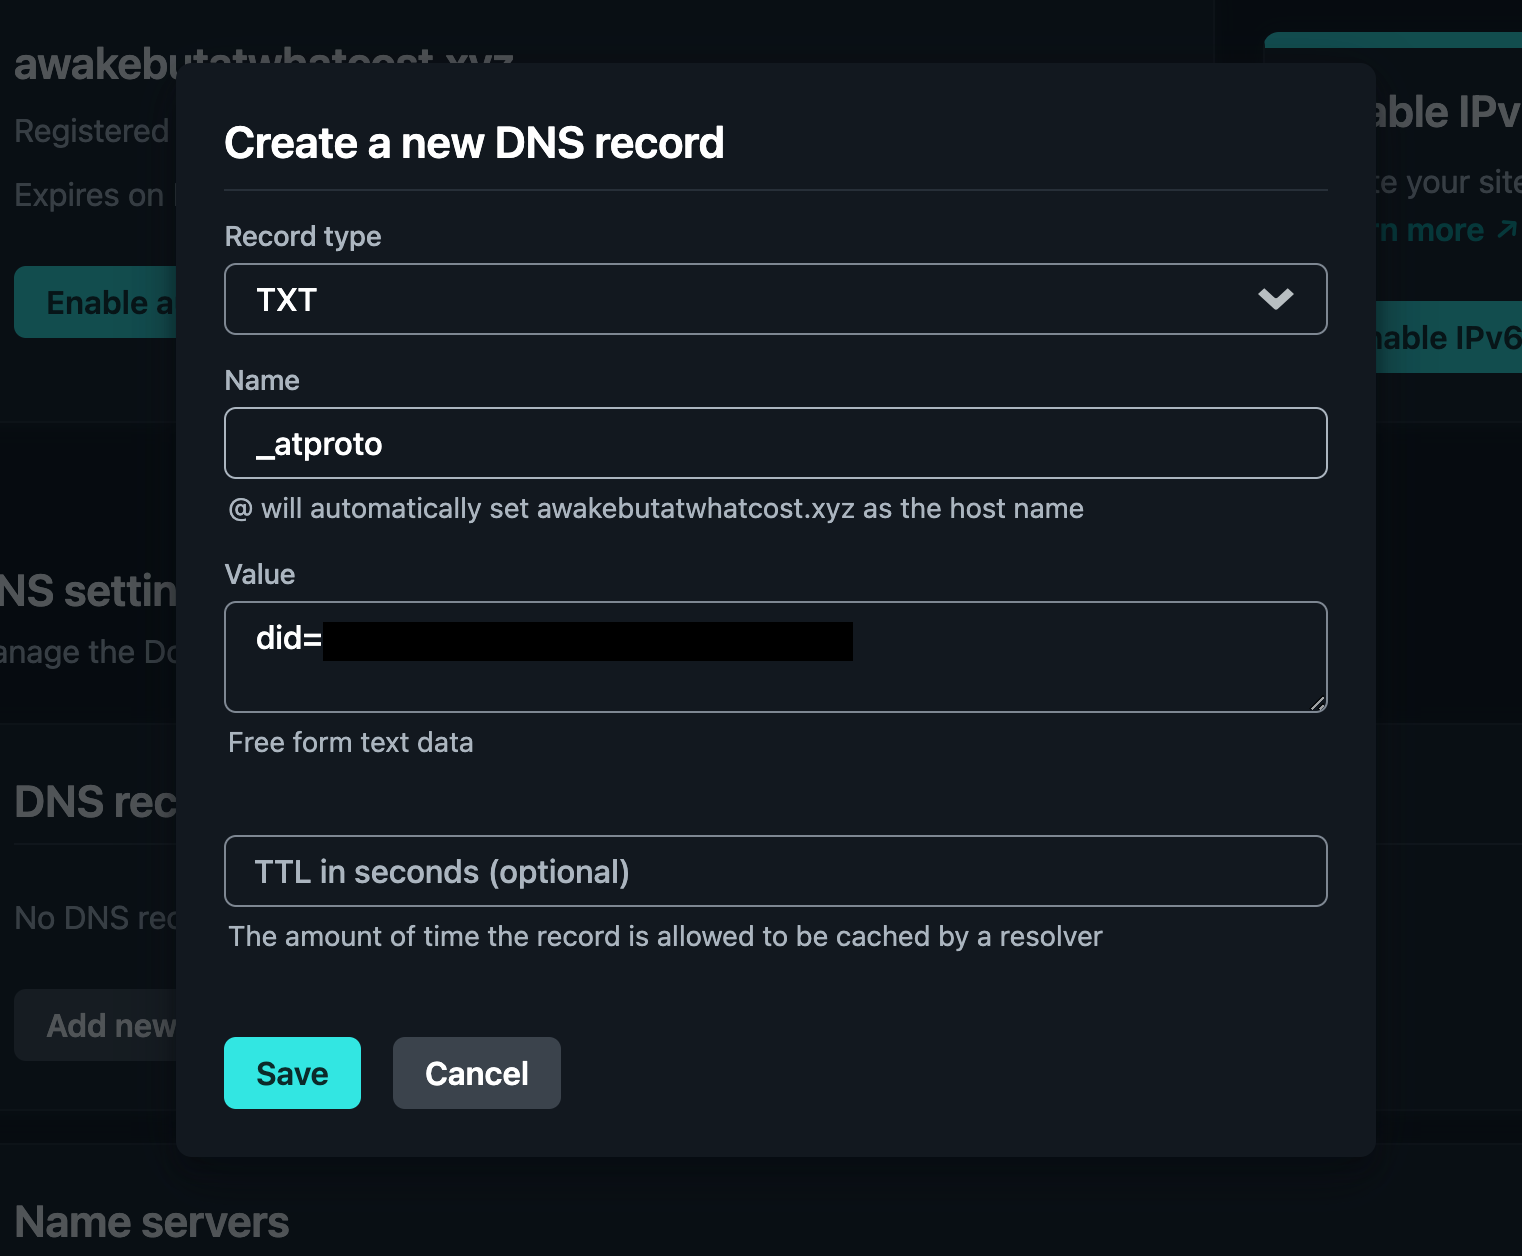
- Under "DNS Settings" > "DNS Records", click on "Add new record"
- With the value you copied from Bluesky, select the following settings for your DNS Record:
Record type:TXT
Name:_atproto
Value: WHAT YOU COPIED FROM BLUESKY (starts withdid=)

- Click Save
- Go back to Bluesky, wait a little bit, then click on "Verify Domain"
If all looks good, you should see this screen:

🥳 Congrats! You just setup your custom domain handle on Bluesky!